
Who is ready to get into the holiday spirit and get to decorating and DIY’ing?! This little project is not only super easy and affordable it can be adapted for so many other uses. Change the size and use it to gift wrap or a fun hair accessory, you can use it to trim anything your heart desires.


OK lets get started! For this part you will need yarn, a small piece of cardboard , tape, scissors and pearls. Once you determine how long you want your tassels to be cut the cardboard according to the size desired in length – the width should be a couple of inches longer so that the cardboard is rectangular. Measure and cut a piece of yarn the same width as the cardboard, this will end up being the tie to the tassel that attaches to the rope garland.
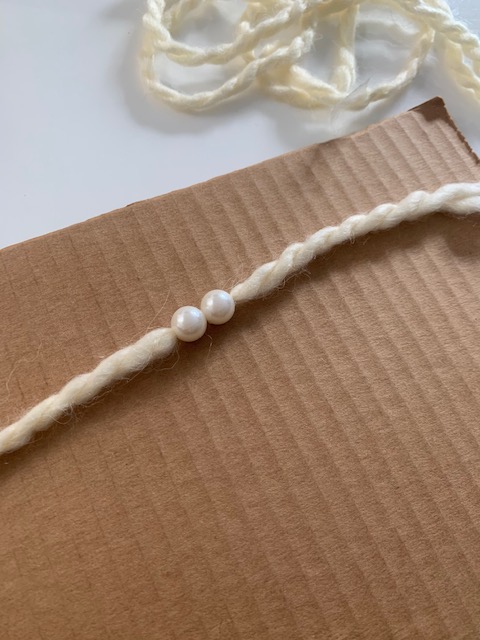

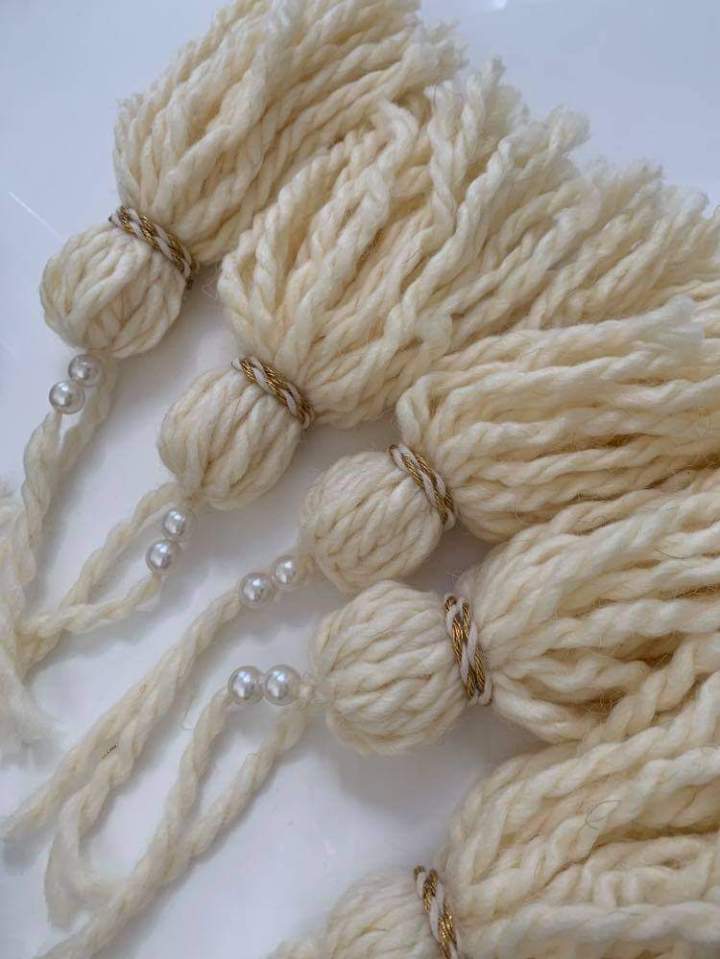
This part is optional, I added some pearls to the strand to add a little more glamour, but you can add any bead or leave it simple. Once the beads are threaded place the strand on the top of the cardboard and secure with tape.


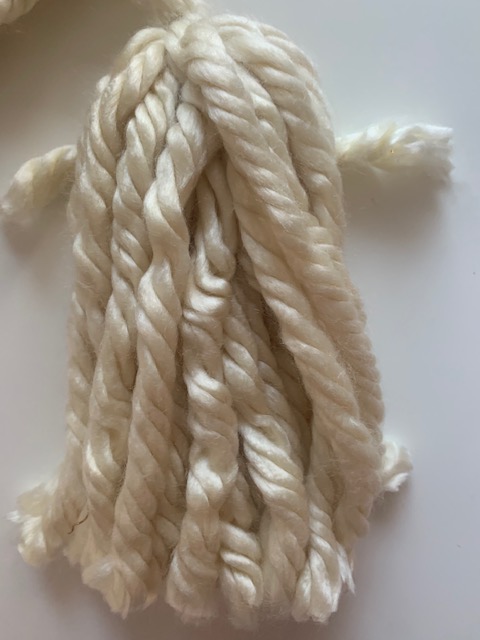
Wrap your yarn around the cardboard and over the stand of yarn that has the beads on it, I wanted my tassels to be nice and full so I wrapped it 20 times. After your done wrapping the yarn, remove the tape from the strand and tie it together tightly, this is to secure the yarn so when you cut it, it will not fall apart.


Cut all the strands on the bottom in a straight line using the edge of the cardboard as a guide. It should look like picture above on the right.

Next cut a piece of yarn long enough so that you can wrap around all the strands . Place the cut piece under all the stands, about an inch under the top .

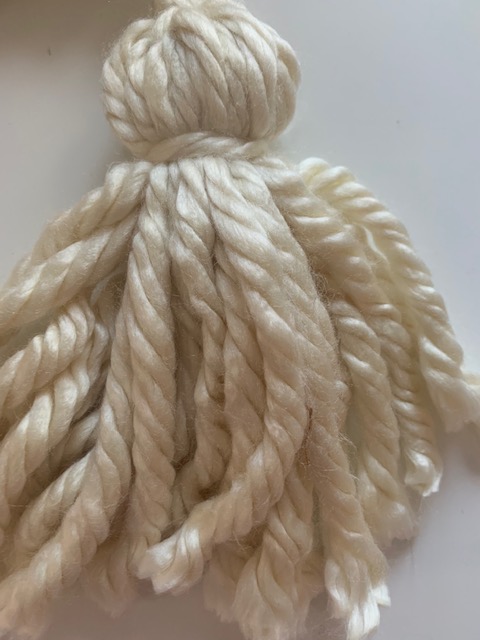
Tie the strand together and make a knot, tie it nice and tight and cut the ends so it lays nice and flush. If you are looking for a simpler style tassel you can finish it off just like this. If you like a little extra finish off with an embellished trim.
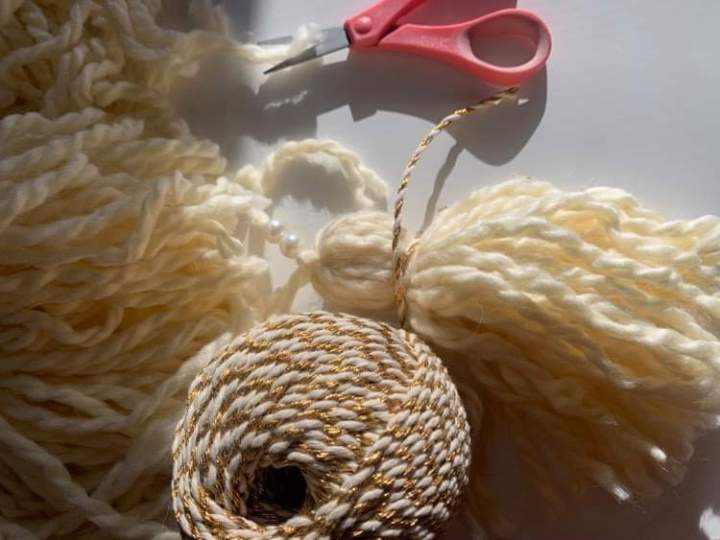


My holiday décor color story includes gold tones, so I wanted to incorporate that in this tassel garland by using this gold and ivory thin rope. I used a hot glue gun to adhere the rope to the tassel for a more finished look, but you can just tie it instead. I wrapped it around twice so that it could not only cover the yarn tie but it would also be more visible and create more of a “waist” on the tassel.

YAY!!! You’re done with the tassel!!! They are so beautiful and classic! Ok now on to making the chain part of the garland.

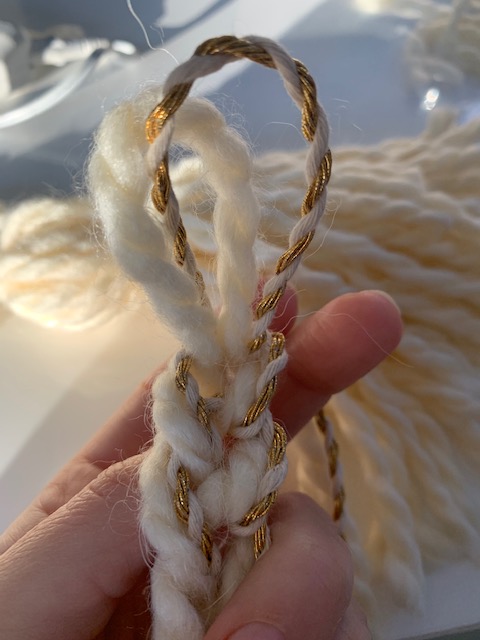

I made it by creating a simple single row finger crochet chain, its a simple technique of just pulling yarn through a loop, here is quick tutorial https://www.allfreecrochet.com/Tutorials/How-to-Finger-Crochet
I made multiple chains some with just the yarn and others I added the gold and ivory rope to the yarn. Both ways are equally beautiful, it just comes down to personal preference. My garland is intended to use on my Christmas tree so my chains had to be very long, about 140 inches, but it can be made as long or as short as you want.
You’re almost done! One last step to glam garland goodness!!

To create symmetry and balance I started placing a tassel in the center of the garland and working my way out spacing it evenly. Once again you can place as many or as little tassels as you want I spaced mine out 20 inches apart.
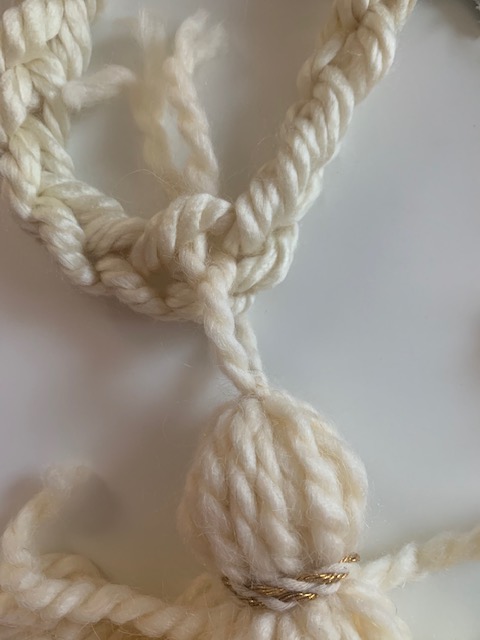
Thread the yarn from the top of the tassel through the center of the braid, tie it, knot it, and cut the ends pretty close so they don’t stick out, you can also use a tiny dot of hot glue so it is secure and doesn’t unravel.
And just like that you are done!!!! Now sit back pour yourself a special libation and enjoy your beautiful garland!
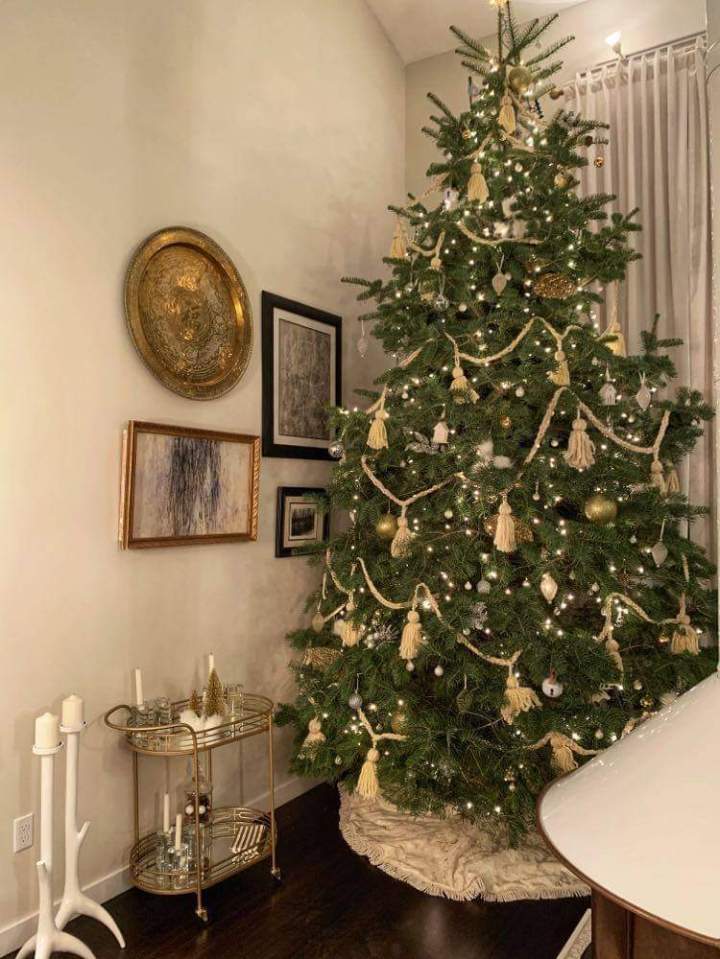
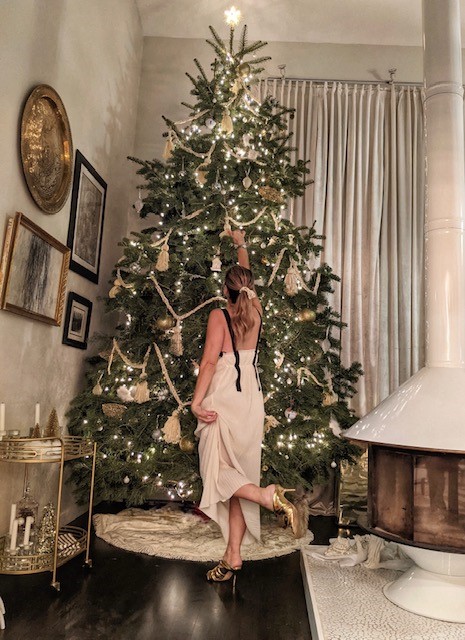
Here is the finished product on our 15ft Christmas tree! It is just the accessory that it needed!
Hope you enjoyed this DIY and are staying safe and healthy during this holiday season.
Just remember to make it your own, and have fun with it!
XO,
JULIA
SUPPLY LIST
- Yarn
- Pearls
- Decorative cord or trim
- Tape
- Cardboard
- Scissors
- Hot Glue Gun

Absolutely beautiful! ♥️
LikeLike
This is so stunning!! I love it!! We just bought a tall artificial tree for the entryway as our “designer” tree. I might have to make one of these garlands for it!!
LikeLike
Such a neat idea! You tree is gorgeous 🎄😍
LikeLiked by 1 person
Thanks May!!! Miss you!
LikeLike
That looks so classic and elegant Julia. We can’t wait to try it. Happy, Merry and Ho Ho Ho! 🕎🎄
LikeLike
Thank you sooo much!!!
LikeLike
Thank you ❤️❤️ Hope you guys are well!!!
LikeLike
So beautiful ❤️❤️Such a talented girl my heart is full of pride ❤️❤️❤️
LikeLike
❤️❤️😘😘
LikeLike
Love this so much!! X
LikeLike
Thanks Kelsey!! Can’t wait for you to make some and for me to see !!! ❤️❤️❤️
LikeLike
Beautiful!!! Merry Christmas!
LikeLike
I absolutely love what you’ve done to your tree! Your house must look incredibly beautiful this time of year. So very proud of you cousin Julia.
LikeLike